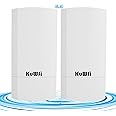
🌟 Bridge the Distance, Own the Connection!
The KuWFi CPE120 Outdoor Wireless Bridge delivers a robust 300Mbps WiFi connection over distances up to 1KM, ideal for extending network coverage to gardens, farms, surveillance cameras, and more. Featuring versatile operation modes, IP65 weatherproof design, and PoE-powered plug-and-play setup, it ensures reliable, long-range wireless connectivity with minimal hassle.


| Brand | KuWFi |
| Product Dimensions | 25 x 20 x 10 cm; 980 g |
| Item model number | CPE70R |
| Manufacturer | KuWFi |
| Series | CPE120UK |
| Colour | white-1 |
| Wireless Type | 802.11a/b/g/n |
| Are Batteries Included | No |
| Item Weight | 980 g |
| Guaranteed software updates until | unknown |
A**N
Work perfectly and provide a great signal over 250-300m. Setup guide included
Fantastic product. Works far better then expected. Used to transmit WiFi from the house to the garage 250-300m away. The receiver in the garage then repeats the WiFi signal and allows for lan connectivity. Over that distance even with a coverage from trees and bushes we still get the same speed and little latency (barely noticeable).There really isn't much information on how to get these setup. So I'll try and provide what I think is the most straightforward way.1. Power them on using the POE adapters. They should connect to one another but if not dont worry. They connect properly in the later steps. (if you already have them setup but want to start again hold the reset button on both of them for 7-10s).2. I recommend using a laptop/desktop for the setup process. Go into control panel->network and right click on the WiFi adapter and set the adapter's IP addresses to 192.168.188.100.3. Then connect to H (master) via WiFi. This will be sending the WiFi to the garage in our case. The WiFi will be called Wireless 2.4G and then a series of numbers/letters. The password by default is eight 6's (66666666)4. Then go into any web browser and enter the IP address 192.168.188.253. You will connect to the master.5. Then enter admin as the password. Go on to the wizard page, click AP Mode and then it'll take you through the setup. Here you can change the WiFi name and password and various other settings. I recommend to change the lan from static to same as AP.6. Once the master is configured. Go into control panel on your laptop and change your ethernet adapters IP address to 192.168.188.253 (similar to what we did in step 2).7. Then get an ethernet cable and connect your laptop to the POE adapter for the C (slave).8. Then go into a web browser and type in the IP address 192.168.188.100. You will connect to the slave. (If your laptop is trying to use the WiFi and ignoring the ethernet then you can simply turn off your laptop's WiFi and force it to use ethernet).8. Then use admin as the password. Go into the wizard like before and then set up the slave to be a repeater. Here you will need to enter the master's WiFi details to connect to it.9. You can then decide if you want the repeater to only repeat the signal from the master via the lan port or if you want it to set up its own hotspot at the other end as well.
A**N
This is a review of the KuWFi AX1800 PoE WAP in UK.
This is a review of the KuWFi AX1800 PoE WAP in UK.Even at this price, this is not a product to buy if you have no previous knowledge of setting up a router or AP on a network, as the manufacturer in China lacks any usable local support in UK.Like some others have found, out of the box, I could not get the device to connect via Wifi using the settings given on Amazon. However, the IP address and password for the LAN port are printed on the WAP, so with a network cable connected from a PoE switch/supply already on my network to the WAN/PoE port on the AP, I was able to access the Web-Interface of the AP - IP: 192.168.188.253& pswd: admin. It is then straightforward to access the Network Settings for the WAP (to give it a fixed IP - which turns it into an AP) and the WiFi settings (to change the password etc). From there on it settles down to “just work” as a PoE WAP.In the box you do get a network cable, a wall/cieling mounting bracket (with wall-plugs and screws provided), and a UK 3-pin PoE adapter, but no other form of 12V supply, for which the AP has a socket provided.If you search for "Review: KuWFi AX1800 PoE WAP" you will find an excellent UK based review of the product that goes into some detail of the web interface, and if you want greater security from the firmware then search for "OpenWrt-Kuwfi-CPE830" where you will find details of how to change the firmware (which will invalidate any warranty). At this stage it's still within the Amazon 30 day return, and working. Time will tell as to longer term reliability, but the loose wording on Amazon suggests the 12-month warranty would involve the customer returning the defective device to China rather than Amazon. As the link given in the Amazon description for the (English?) manual is to a Chinese language web-site, it does not engender any faith in any English language support or local warranty. I have, via Amazon, asked the supplier for a link to an English Language manual, so I will be interested to see the outcome.Afternote: The seller has provided the manual but Amazon don't allow attachments, so I can't share it.
M**S
Works really well
No issues setting up like others have mentioned. Guide is basic but provides enough info to get going. Performance and range are good enough for my needs and for this price it’s hard to argue
Y**F
Bad instructions
The instructions to set up the product are unclear and until now I can’t connect it to my laptop. Wasted so much time trying to figure it out and still can’t do it. Waste of time and money
J**P
Excellent product and no complicated set up procedures.
A perfect product for my needs. No messing about with complicated set up procedures. For my simple installation of getting WiFi to an old thick stone walled building some distance from my house the factory setting were all that I needed. My router was at the front of my property but the bridge worked when plugged into a TP-Link booster which which provided WiFi to an office at the rear (via mains electricity circuit). The other end the of the bridge was connected to a Tp-Link modem and the signal was strong enough to site both ends of the bridge behind glass windows making installation much easier. Full marks for this product.
Trustpilot
1 day ago
2 days ago